
Wondering how to add author photo in WordPress site? The good news is that displaying an author photo in WordPress can be done in just a few simple steps.
Table of Contents
The Benefits of Displaying an Author Photo in WordPress
First, an author photo makes a website look more professional. Readers are more likely to trust an author who shows their real face than one who remains anonymous.
For websites with multiple writers, author photos help readers recognize their favorite contributors. Many multi-author websites showcase their writers’ pictures for this reason.
Whether you realize it or not, an author photo helps build a writer’s personal brand. This includes fostering a connection with readers and making the content feel more personal.
Author photos also have an indirect impact on SEO. When integrated with schema markup, an author’s display picture can increase clicks from search engine results.
So, how do you add an author photo display in WordPress? Keep reading to find out.
How to Add Author Photo in WordPress
So, how do you add author photo in WordPress website? You can display an author photo using two main methods:
a. Adding an Author Photo Using Gravatar
Gravatar, which stands for Globally Recognized Avatar, is a service that allows users to use a single profile picture across various platforms, blogs, or websites that support it.
A key advantage is that profile photos served by Gravatar don’t take up your own storage space because the images are stored on Gravatar’s servers.
This also means there’s no native option for users to upload a photo locally if they prefer not to use Gravatar. Here’s how to add an author photo in WordPress using Gravatar:
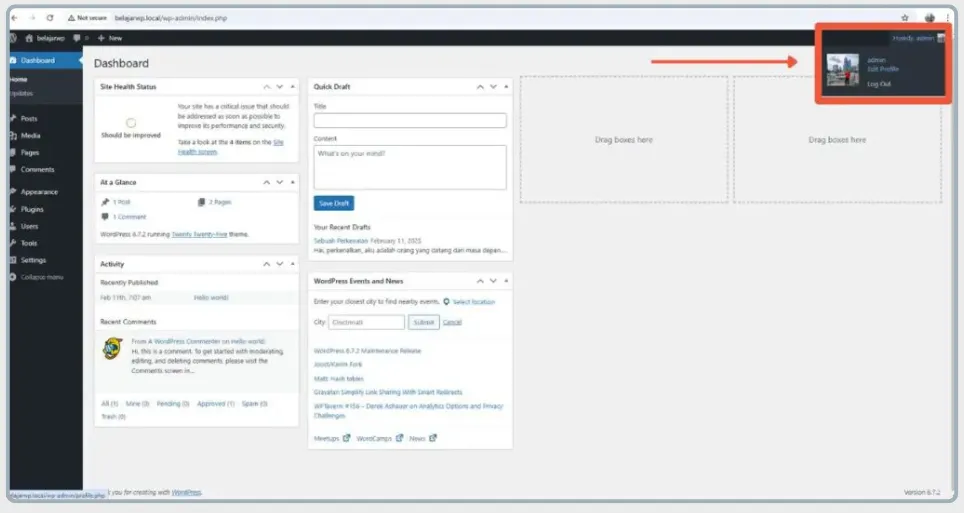
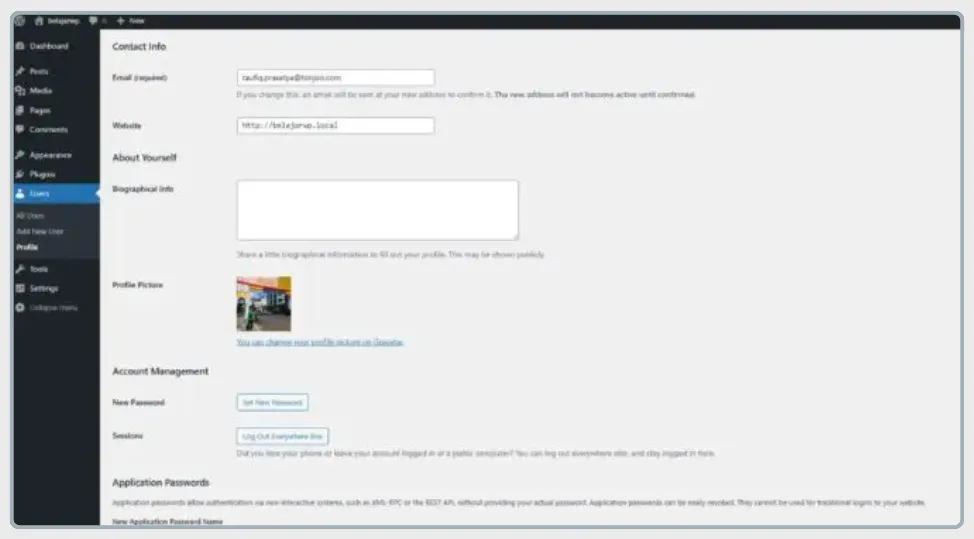
- First, go to your profile page from the Dashboard by navigating to Dashboard > Edit Profile.
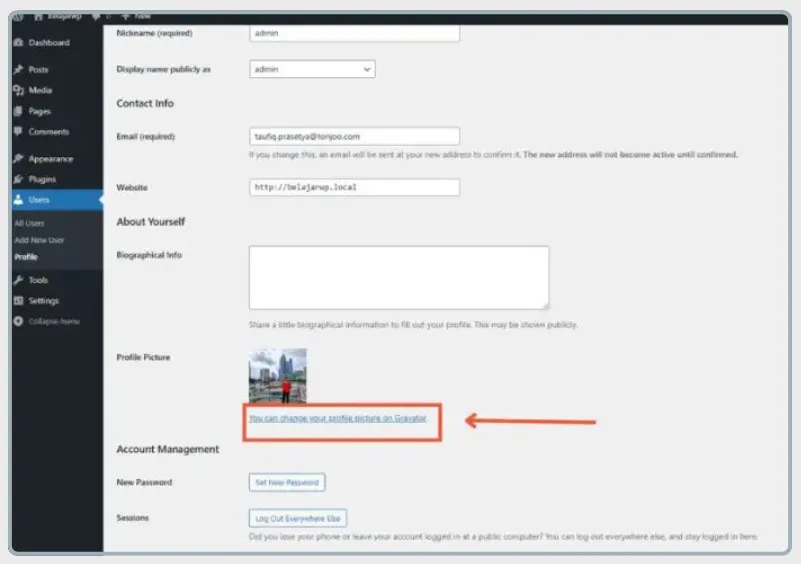
- On the profile page, click the text that says, You can change your profile picture on Gravatar. You will be redirected to the Gravatar homepage.
- Third, click Get Started Now if you don’t have a Gravatar account. If you already have one, simply click Login.

- Fourth, you’ll be asked to enter your email address. It’s best to use the same email address associated with your WordPress account.
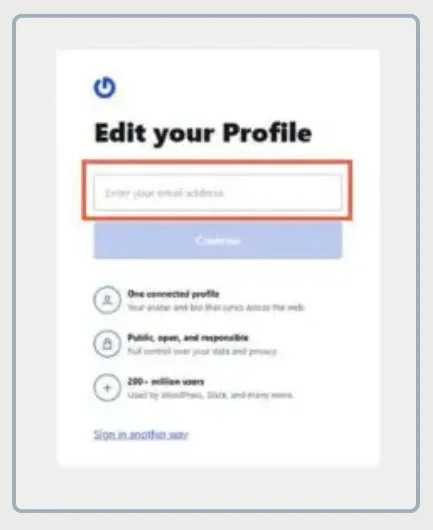
- Fifth, enter the verification code sent by Gravatar to your email. Once done, click Continue.

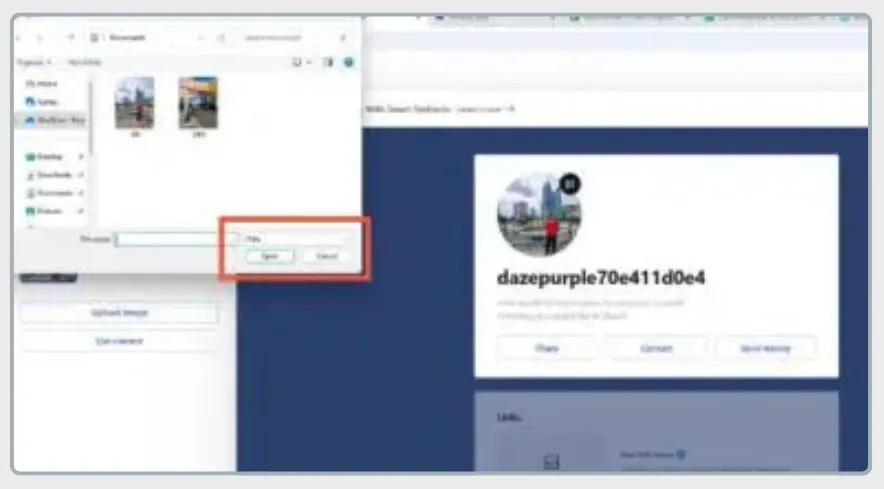
- Sixth, click Upload Image to add your WordPress author photo. Select the desired image and click Open.
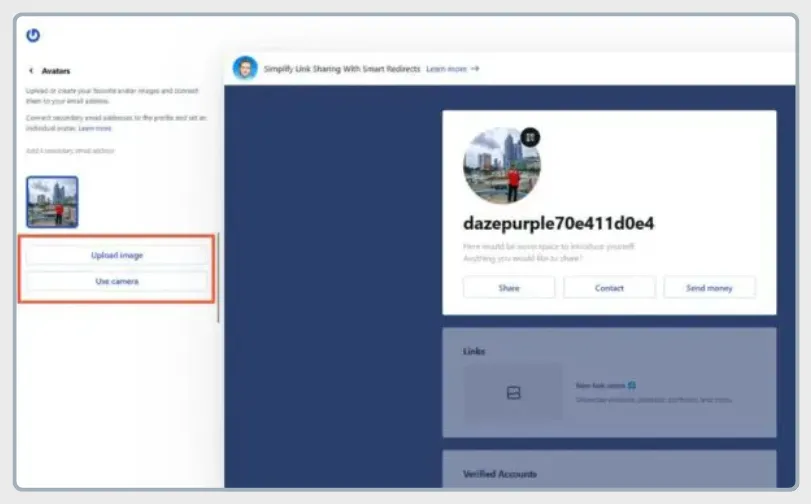
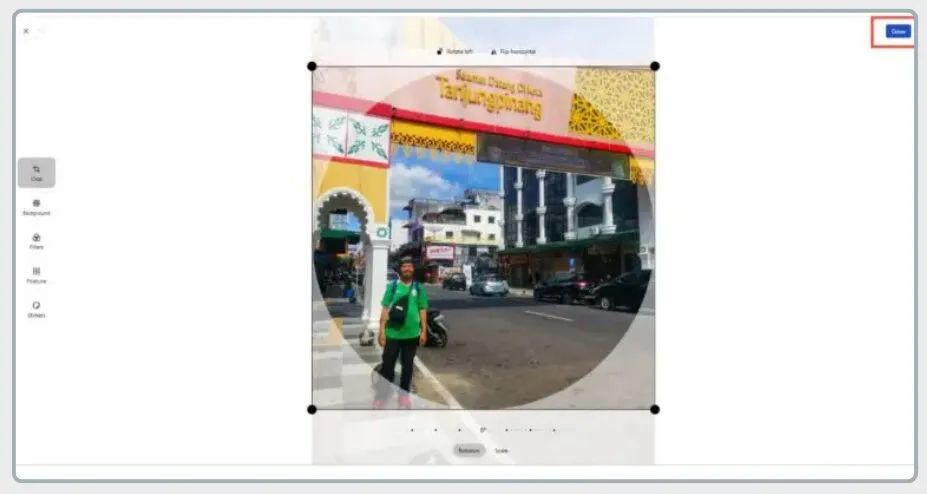
- Seventh, you will be taken to a photo editing page. If you’re happy with the crop, click Done.
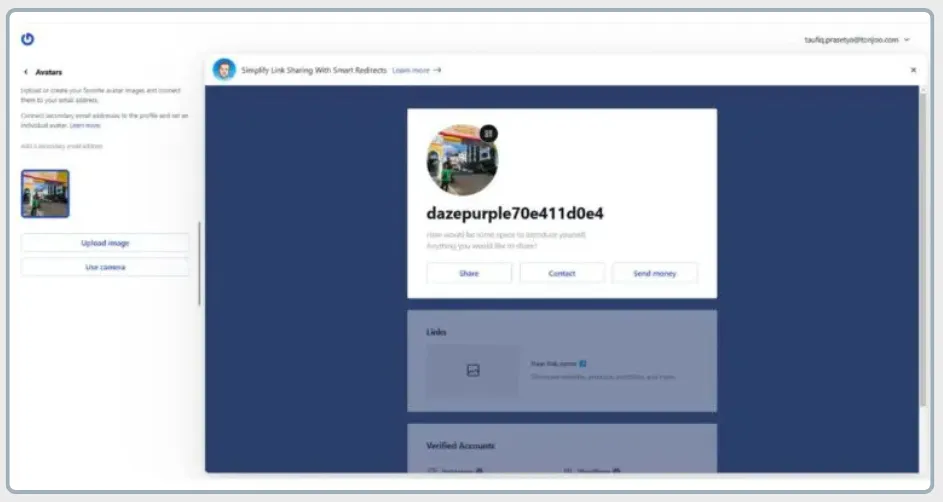
- Your photo has now been added. Don’t forget to click Update Profile to save the changes.
b. Adding an Author Photo Using the One User Avatar Plugin
Besides using Gravatar, you can also display or add an author photo by installing plugin on your WordPress website. In this tutorial, we’ll use the One User Avatar plugin.
The main difference from Gravatar is that your photo will be stored on your own hosting server, which means it will consume your website’s storage space. Displaying an author photo in WordPress using the One User Avatar plugin is very straightforward. Here are the steps:
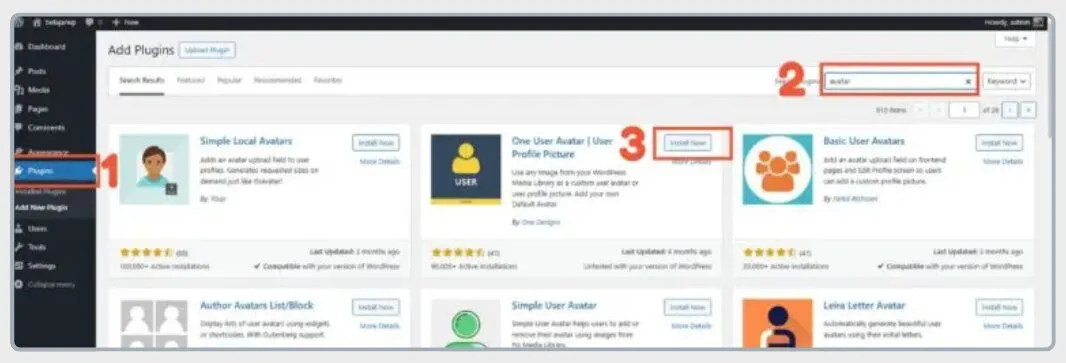
- From your WordPress dashboard, go to the Plugins > Add New menu. Type the keyword Avatar into the search bar. Once the search results appear, click Install Now on the One User Avatar plugin.
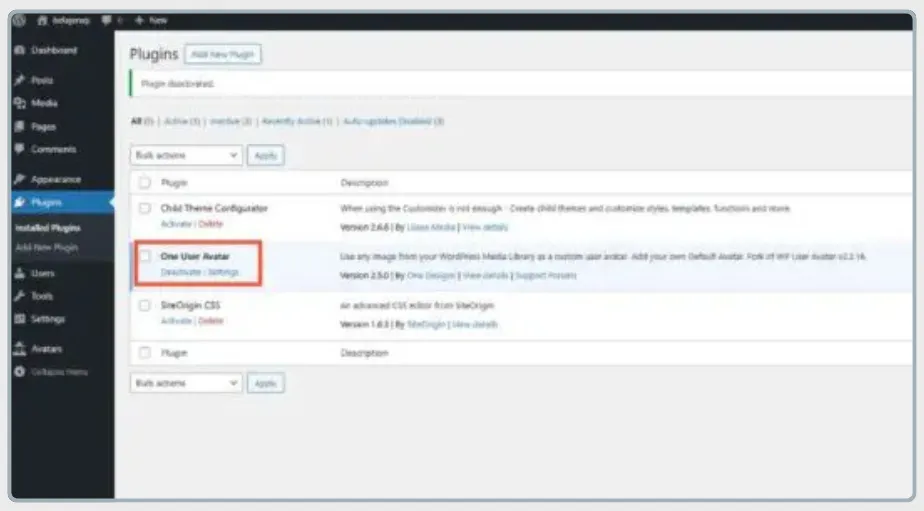
- After the plugin is installed, click Activate. Make sure the plugin has been installed correctly.

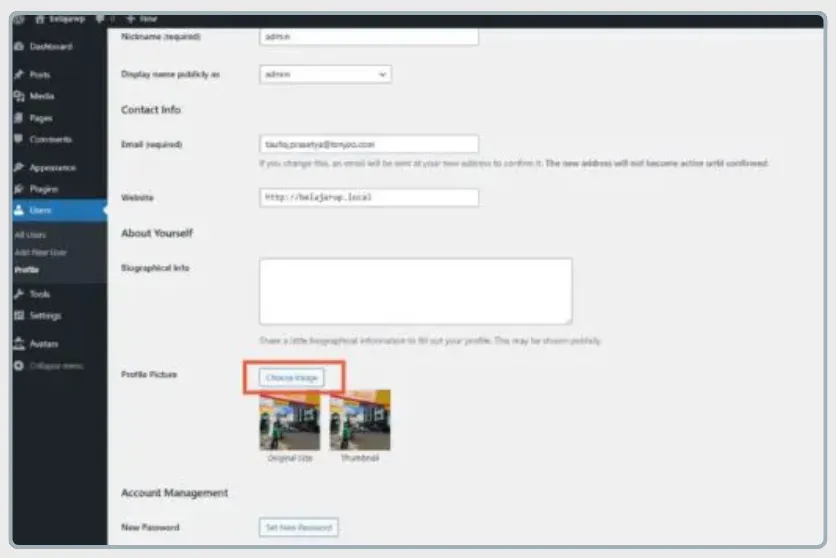
- To add the author display photo, return to your profile page, and then click Choose Image. As a side note, Gravatar is automatically disabled when the One User Avatar plugin is active.
- Next, click Select Files. Choose the image you want to use as your display photo in WordPress and click Open.
- If the image is correct, click Select.
- After the image is uploaded, don’t forget to click Update Profile.
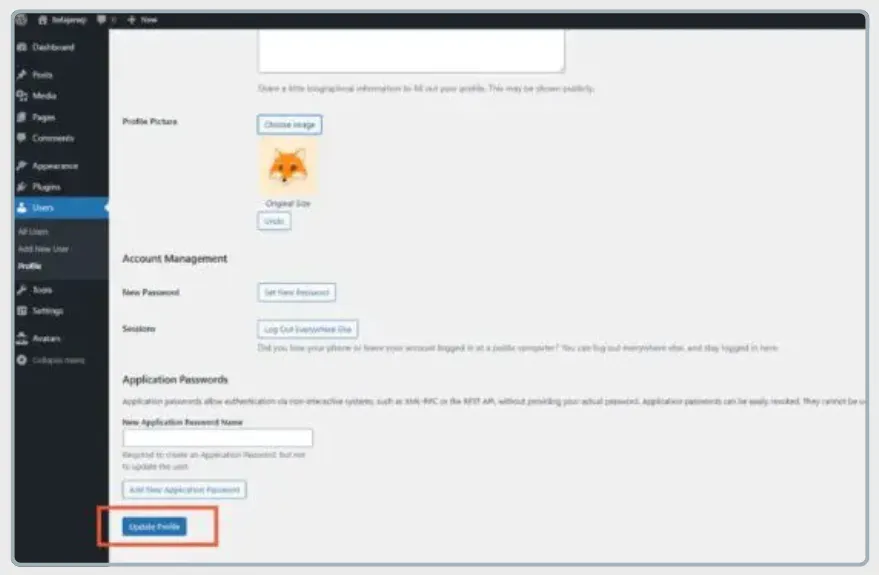
And there you have it—the steps to add author photo WordPress website with the One User Avatar plugin.
If you encounter any issues while installing the plugin, you can read our article on how to fix plugin installation problems.
Successfully Added Your Author Photo in WordPress?
That concludes our tutorial on how to add author photo in WordPress website. A post that includes the author’s picture has the potential to increase engagement between the writer and the readers.
By default, Gravatar is the tool used to change the author’s photo in WordPress. If you want to reactivate Gravatar, simply deactivate any third-party avatar plugin.
For websites with multiple writers, author photos make it easier for the audience to distinguish between each writer’s style and personality. WordPress itself fully supports multi-author websites.
If you’re looking for a website with a unique look that stands out from the rest, leave it to Tonjoo. With over 10 years of experience in the professional website development industry, Tonjoo Team is ready to bring your dream website to life.
Read related articles about WordPress, WooCommerce, plugins, and other website development topics by Moch. Nasikhun Amin on the Tonjoo’s blog.
Updated on September 21, 2025 by Moch. Nasikhun Amin


