Installing WordPress plugins on localhost can be done manually, either online or offline. You can choose the method that best suits your needs.
This can be done through your WordPress wp-admin dashboard or through the web server folder on your localhost.
That way, you can take advantage of the most useful WooCommerce plugins and other essential plugins. So, how do you install WordPress plugins correctly?
Find out more below!
Table of Contents
How to Install WordPress Plugin on Localhost?
Here are three ways to install WordPress plugins: (1.) through the Add Plugin menu, (2.) through the Upload option, and (3.) through the web server folder on your localhost.
1. How to Install Plugin WordPress from Add Plugin Menu
The first way to install WordPress plugins on localhost requires you to be online or connected to the internet. It utilizes the plugin search feature in WordPress.
- Login to your WordPress dashboard.
- On the menu on the left, click the Plugins option > then click Add New.

- Go to the plugin search box and type in the name of the free plugin you want to install. Here we installed Disable Gutenberg. If so, click Enter.

- If you find the plugin software, click Install Now.
- Wait a few moments, then click Activate.

2. How to Install Plugin WordPress via Upload Menu
The second method to install a plugin in WordPress is by uploading the plugin file. This can be done offline, given that you already have the plugin file you want to install.
- Log in to your WordPress dashboard.
- On the menu on the left, click the Plugins option > click Add New.
- Click Upload Plugin.

- Click Choose File.

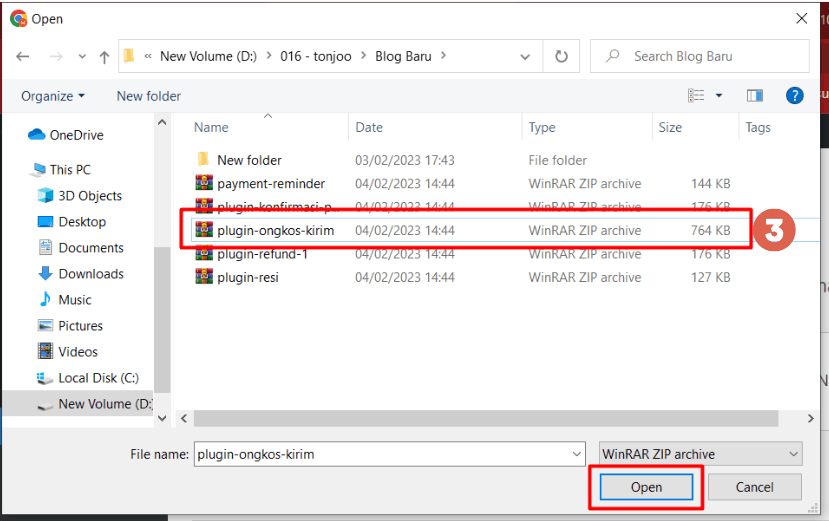
- Select the plugin file you want to install. Make sure the file is in RAR format. For example, we are using the postage plugin file. If so, click Open.

- Click Install Now.

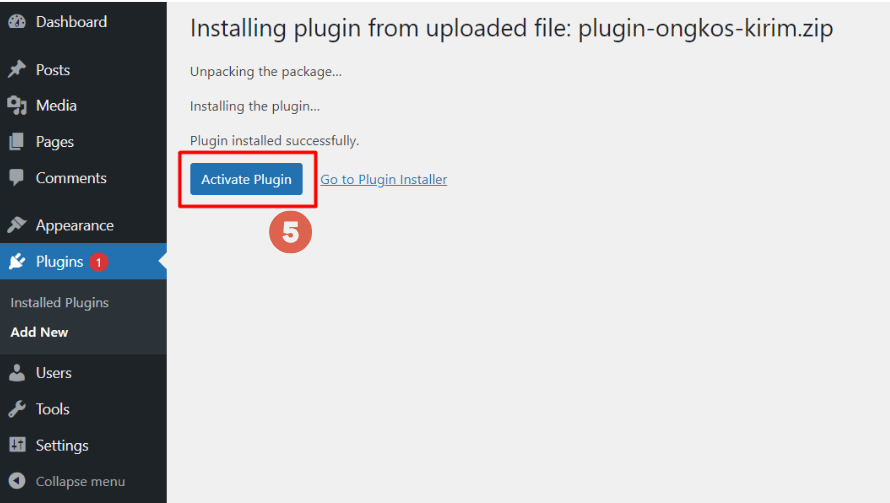
- Wait for a minutes, and click Activate Plugin.

- Done. You’ve successfully installed the WordPress plugin manually.
3. How to Install WordPress Plugin via Local Folder
The next way to install WordPress plugins offline is through a localhost folder. Here, we’re using a WampServer web server as an example. If you’re using any other type of web server, the steps are more or less the same.
- Extract the plugin file that will be installed in WordPress.

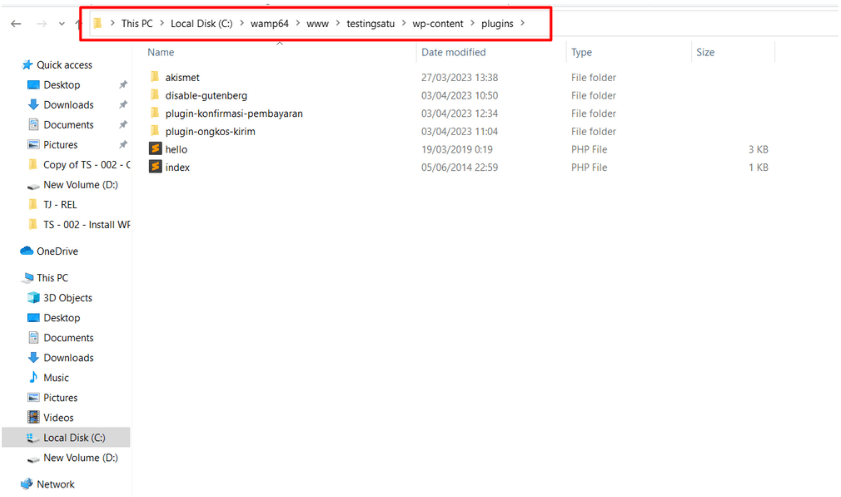
- Copy the plugin folder to the web server you are using. For example, if you are using WampServer, then copy to (C:) > wamp64 > www > (wordpress name. here we use the name testingsatu) > wp-content > plugins.

- Paste the plugin file in the Plugins folder.
- Open WordPress on localhost.
- Click the Plugins menu> Installed Plugins > find the plugin that was inserted earlier and click Activate.

Have You Successfully Installed WordPress Plugins?
Here is the end of the tutorial on how to install WordPress plugins easily, both online and offline. The above method is a tutorial for WordPress development on localhost.
In this trial, we used the WampServer web server. If you want to use another web server, such as XAMPP, please refer to the tutorial on how to install WordPress on XAMPP.
However, developing a website by yourself might cost you quite a lot of obstacles, such as when the WampServer icon is orange.
If you don’t want to mess around with various website development problems, you can assign it to Tonjoo Team, a professional website developer with more than 10 years of experience.
We have handled everything from government websites, start-ups, to multinational company such as Astra and Hipwee. Let’s discuss your dream website through Tonjoo Contact and we will help make it into a reality!
Updated on July 10, 2023 by Hanif Mufid


