WordPress maintenance mode is an incredibly useful feature when you’re updating, repairing, or developing your website.
By activating this mode, visitors to your site will see a dedicated page informing them that the website is currently undergoing maintenance.
This article will cover what WordPress maintenance mode is, how to prepare for it, and the steps to activate it on your WordPress site.
Table of Contents
What Is WordPress Maintenance Mode?
Website maintenance mode is a state where a website is temporarily made inaccessible to regular visitors. This mode is activated for purposes such as maintenance, content updates, repairs, or development in the WordPress website.
When in this mode, visitors are redirected to a special page that displays a message indicating the site is under construction. This is crucial to prevent visitors from seeing a broken page or incomplete content.
Preparations Before Activating Maintenance Mode
1. Don’t Forget to Back Up Your Entire Site
Regardless of the method you choose, always back up your data before performing any maintenance. This minimizes the risk of data loss or errors that could potentially break your website.
2. Prepare a Message for Your Visitors
Before enabling maintenance mode, announce the upcoming work on your social media channels or via your newsletter. This helps reduce frustration from visitors who might not understand why the site is inaccessible.
How to Activate WordPress Maintenance Mode
Once you’ve completed your preparations, it’s time to activate maintenance mode. There are two common ways to do this: using a plugin or doing it manually. Here are the steps for both methods.
1. Using Plugin
Several plugins can help you enable maintenance mode. You can read recommendations for WordPress maintenance plugins to find one that suits your needs.
For this tutorial, we will use Coming Soon Page, Maintenance Mode, Landing Pages & WordPress Website Builder by SeedProd.
Here’s how to enable WordPress maintenance mode using the SeedProd plugin:
- Install and activate the Coming Soon Page, Maintenance Mode, Landing Pages & WordPress Website Builder by SeedProd plugin. You can follow a guide on how to install a WordPress plugin if you’re unsure.

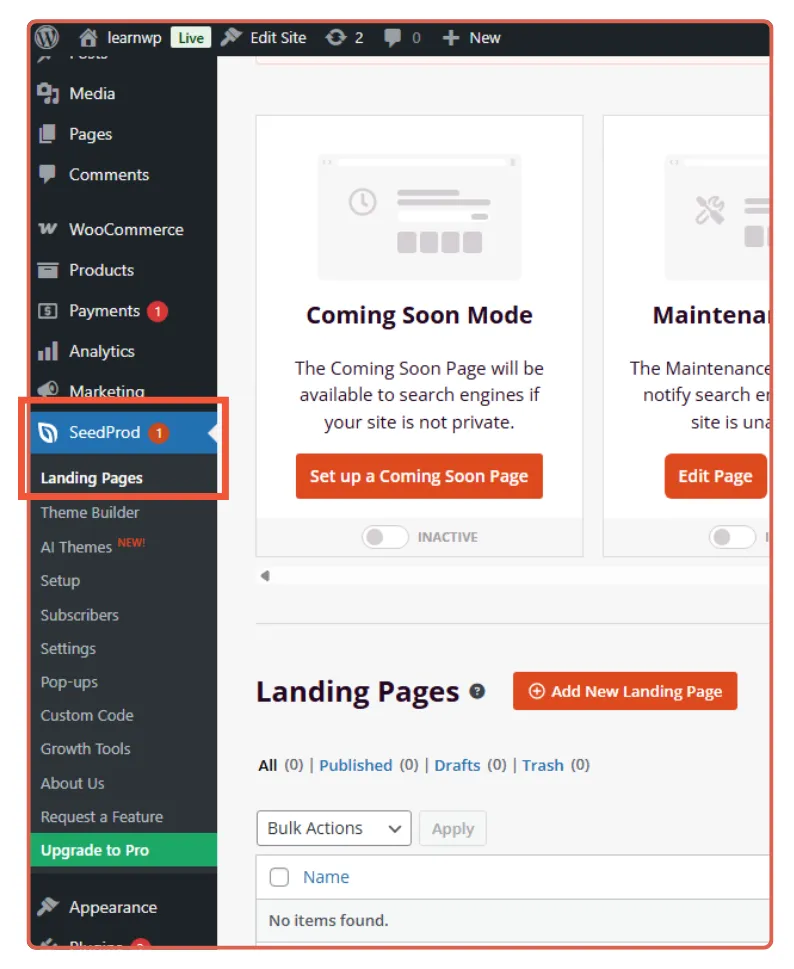
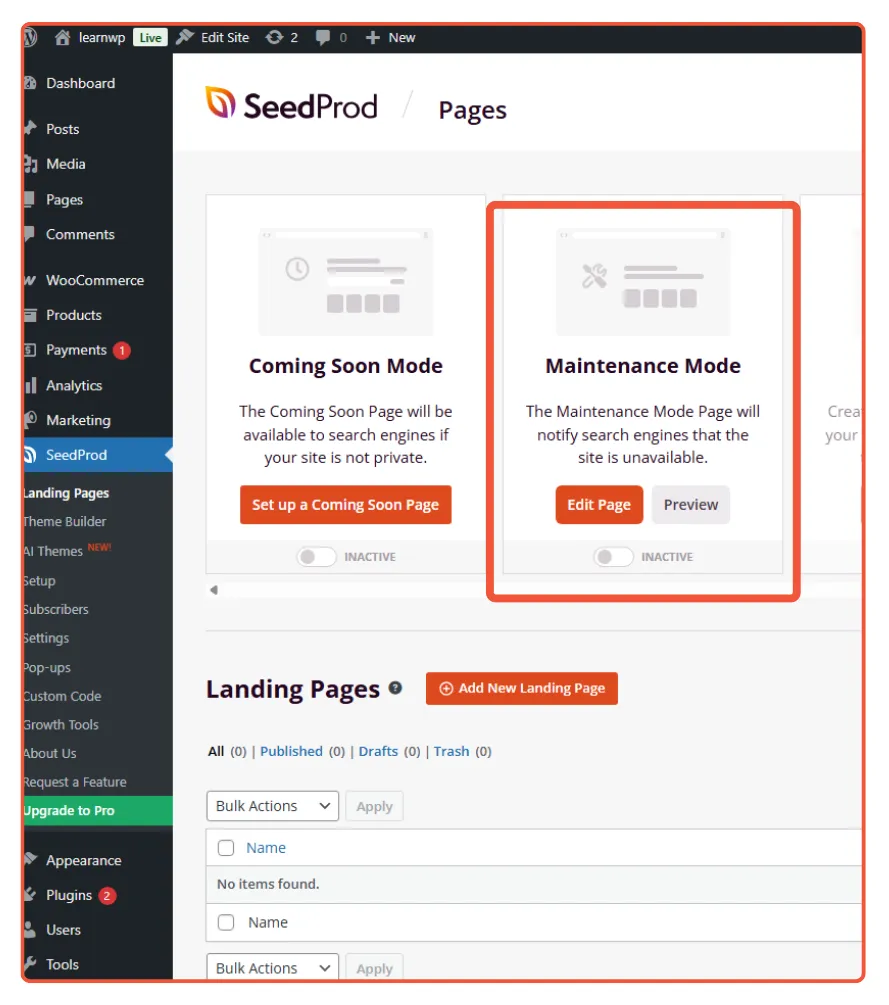
- Once the plugin is active, navigate to SeedProd > Landing Pages. Before activating maintenance mode, click Edit Page to customize your maintenance page.
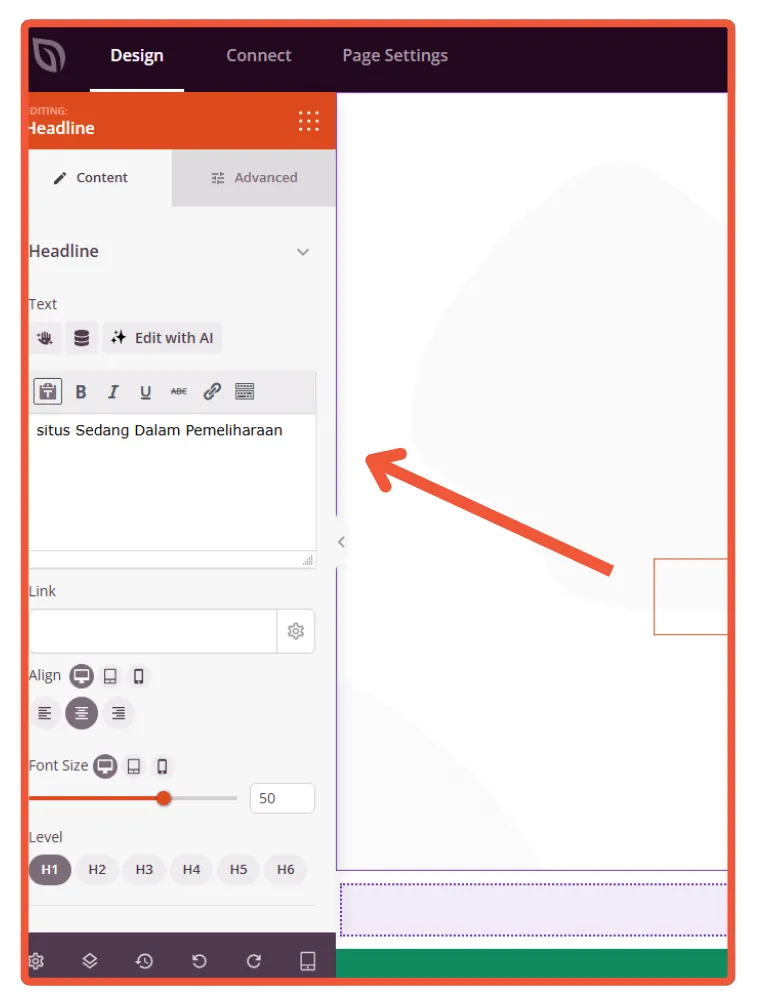
- On the page editor, you can adjust the settings. For example, to change the page’s headline, click the Headline section. You will then be prompted to fill in a text box with the headline you want.
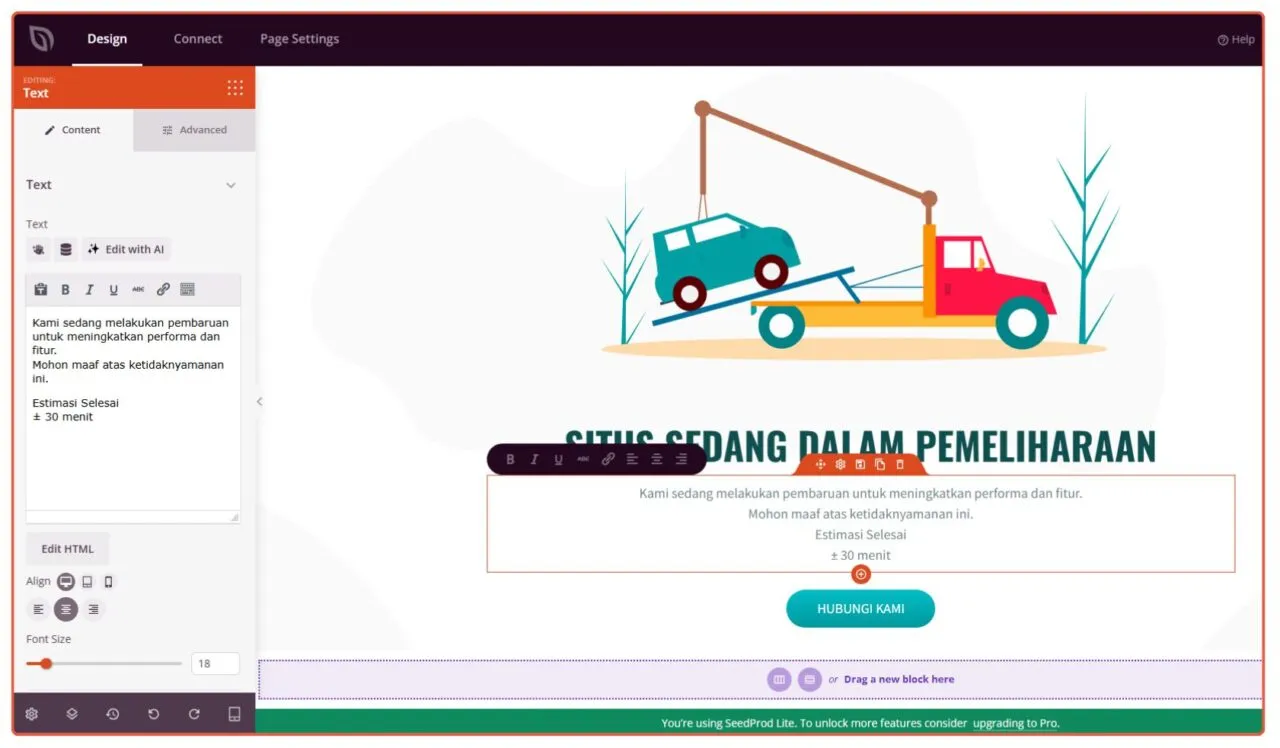
- After setting the headline, you can configure the message you want to display to visitors. Be sure to include an estimated timeframe and contact information they can use while the maintenance is ongoing.
- Return to the SeedProd > Landing Pages screen and toggle the switch under the Maintenance Mode tab to Active.
- Here is an example of what your website will look like in maintenance mode:

- To deactivate maintenance mode, simply toggle the switch under the Maintenance Mode tab back to Inactive.

- Using SeedProd to manage WordPress maintenance mode is very straightforward—it’s as simple as flipping a switch.
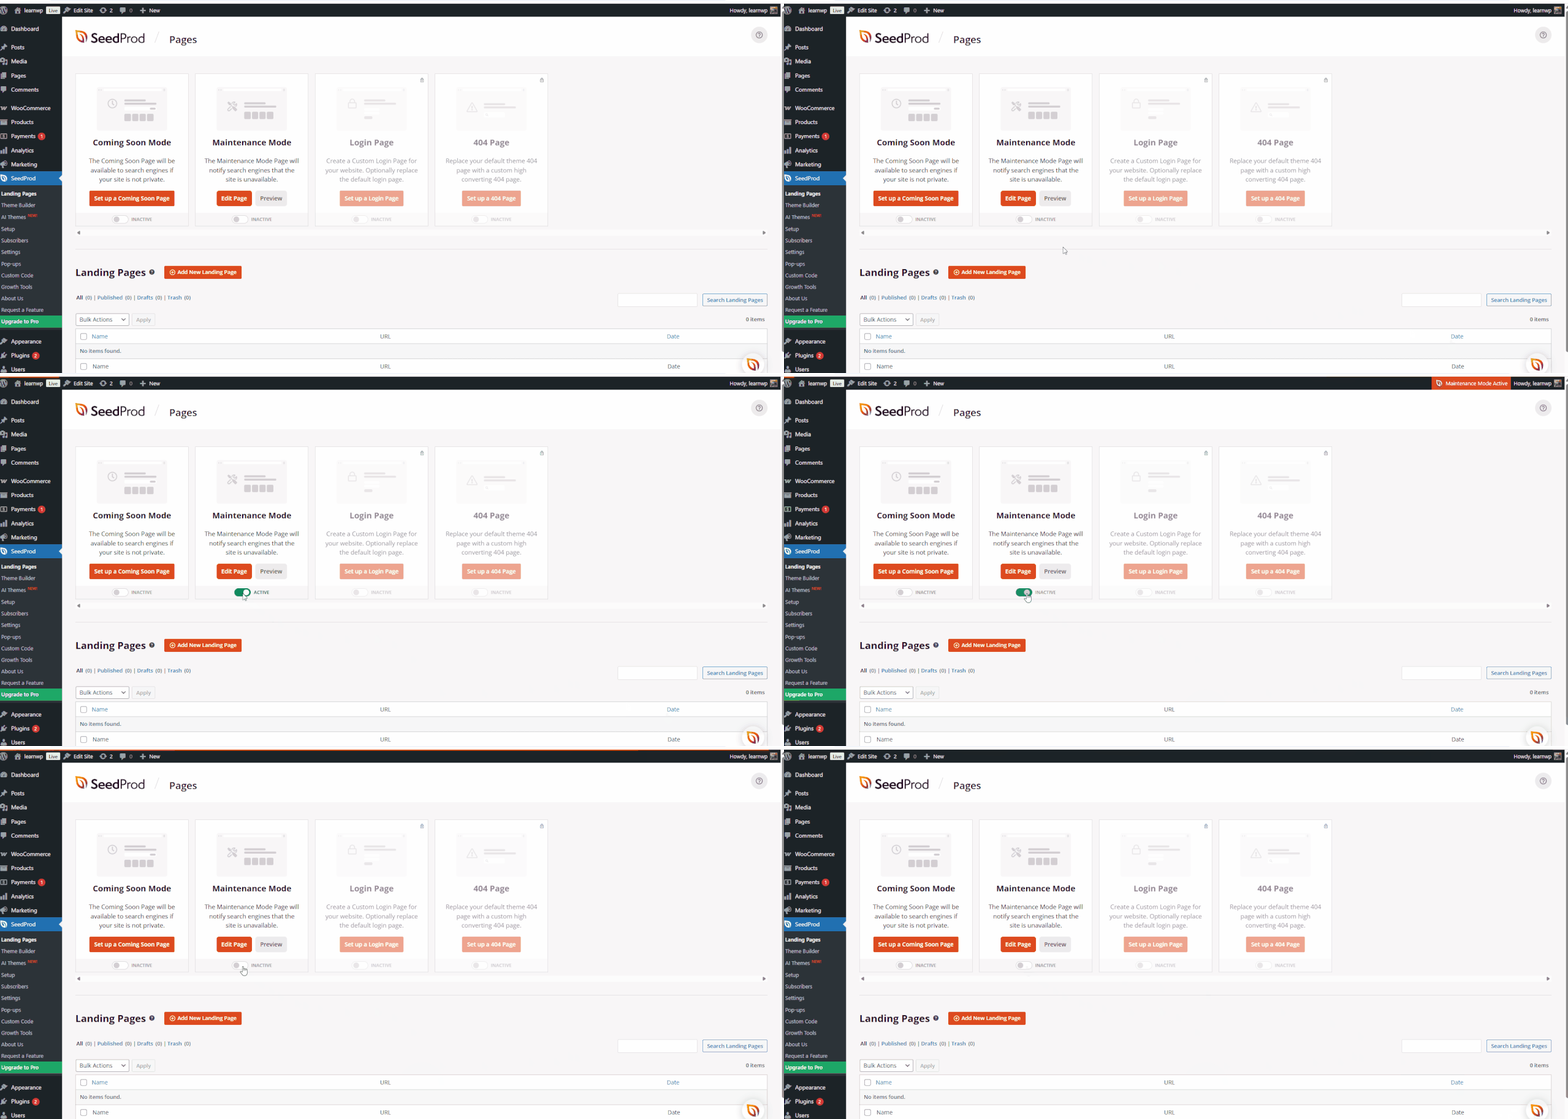
That’s how to enable WordPress maintenance mode using plugin. In case you have problem with the installation, read how to fix plugin installation problems.
2. Using Manual Method
Besides using a plugin, you can also enable WordPress maintenance mode manually. This tutorial will guide you through activating it by editing your wp-config.php file.
Follow these steps:
- First, access your WordPress root directory. In this example, the path is learnwp > app > public > wp-config.php.
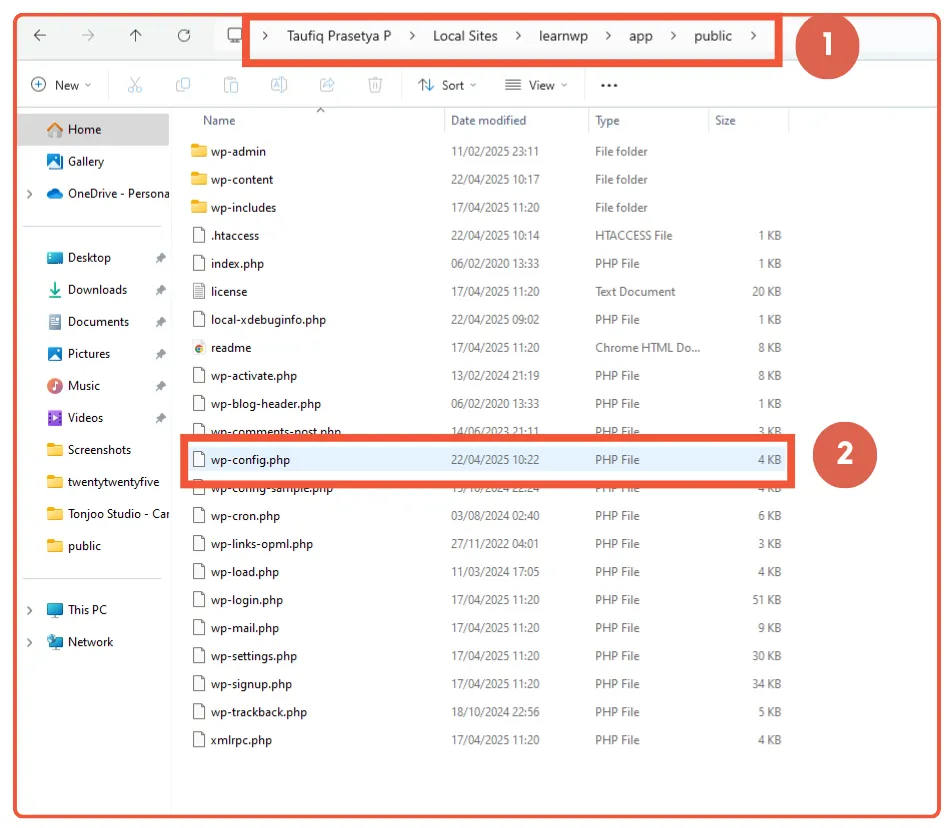
- Open the wp-config.php file using a text editor like Notepad or Sublime Text. Copy the code below and paste it into your wp-config.php file.
// Enable maintenance mode define('WP_MAINTENANCE_MODE', true); // Add this conditional to allow admin access if (WP_MAINTENANCE_MODE && !current_user_can('manage_options') && !is_admin()) { header('HTTP/1.1 503 Service Unavailable'); header('Content-Type: text/html; charset=utf-8'); echo '<h1>Maintenance Mode</h1><p>We are currently performing scheduled maintenance. Please check back soon.</p>'; exit(); } - After pasting the code, click Save.
This is how the default WordPress maintenance mode page will appear when activated via wp-config.php:
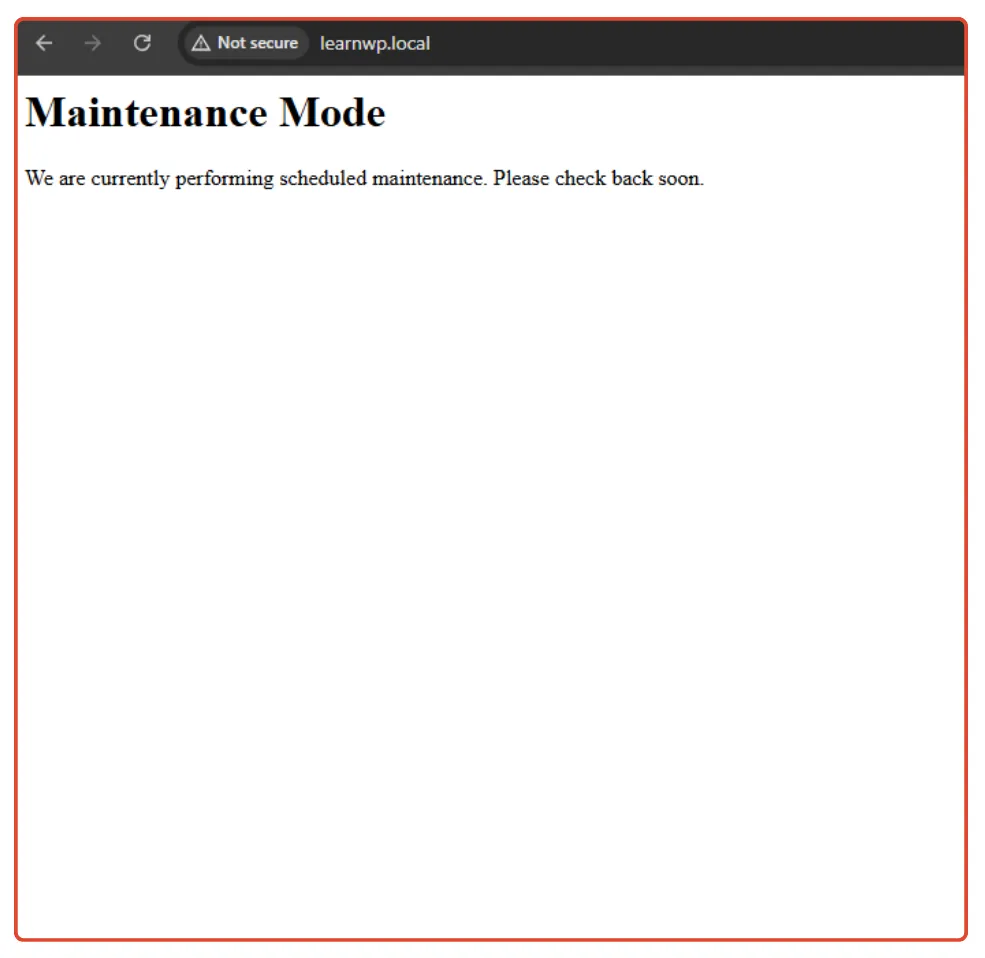
To deactivate maintenance mode, simply change true to false or delete the code snippet entirely from your wp-config.php file.
Important Tips:
- Always test to ensure your maintenance page is working correctly.
- Test it in your browser’s incognito or private mode.
- Don’t forget to deactivate maintenance mode once your website updates or repairs are complete.
Successfully Activated WordPress Maintenance Mode?
That’s how you can enable WordPress maintenance mode. You can activate it in two ways: by using a plugin or by doing it manually.
If you’re looking for a hassle-free option, the Coming Soon Page, Maintenance Mode, Landing Pages & WordPress Website Builder by SeedProd plugin is an excellent choice.
Alternatively, you can edit the wp-config.php file to enable maintenance mode. This method is better suited for those with technical expertise in website development.
If you don’t want the headache of managing your WordPress site and prefer to focus on growing your business, entrust it to Tonjoo, a professional WordPress Maintenance Service provider in Indonesia.
Read related articles about WordPress, WooCommerce, plugins, and other website development topics by Moch. Nasikhun Amin on the Tonjoo’s blog.
Updated on October 12, 2025 by Moch. Nasikhun Amin


