Installing XAMPP on Windows can be a solution for those who want to develop a website on a local computer without using hosting.
The reasons can be various, such as not having hosting yet, still developing the website, or for testing purposes.
By installing XAMPP, various types of web technologies can be easily explored, from Content Management Systems (CMS) like WordPress to Learning Management Systems (LMS) like Moodle.
What is XAMPP?
Before exploring the tutorial on how to install XAMPP on Windows, some of you might not fully understand what XAMPP technology is. So, what exactly is XAMPP?
An acronym for X (Cross Platform) Apache, MySQL, PHP, and Perl, XAMPP is an open-source software that functions as a web server and can be used offline.
For example, in the context of WordPress, XAMPP acts as a localhost to install and develop WordPress without requiring hosting.
Unlike WAMP which is specifically for Windows, the XAMPP application can be used on various operating systems such as Windows, Linux, macOS, and Solaris.
The XAMPP installation process on Linux is different from the method on Windows, because the installation does not require using the command prompt.
How to Install XAMPP on Windows
Here’s how to install XAMPP on Windows easily:
- Install XAMPP on your laptop. You can download it from the Apache Friends website
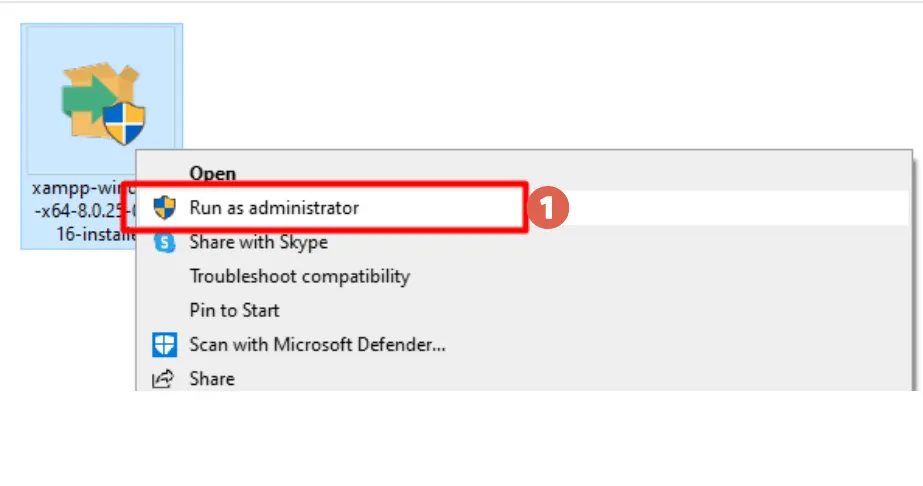
- Once downloaded, right-click on the XAMPP file in RAR format > then select ‘Run as Administrator’
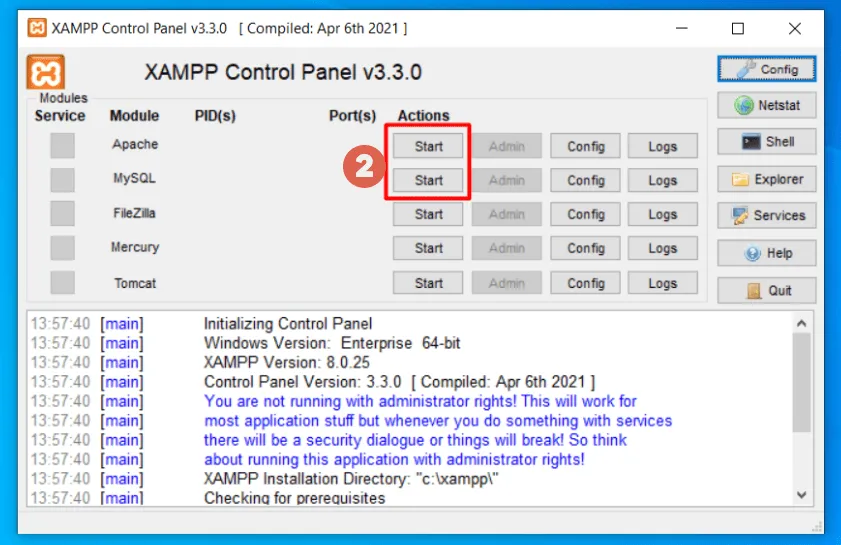
- Click Start on the Apache and MySQL modules. If the MySQL module cannot be started, please uninstall and reinstall your XAMPP
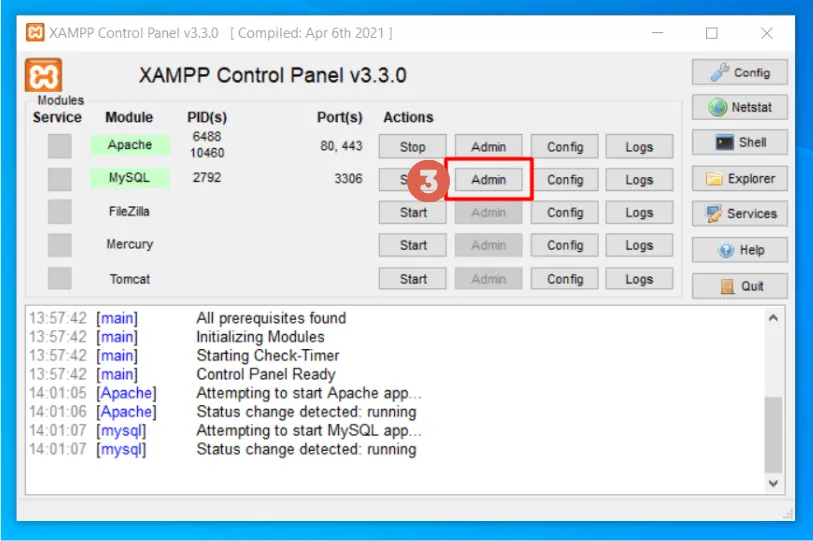
- Click Admin on the MySQL module
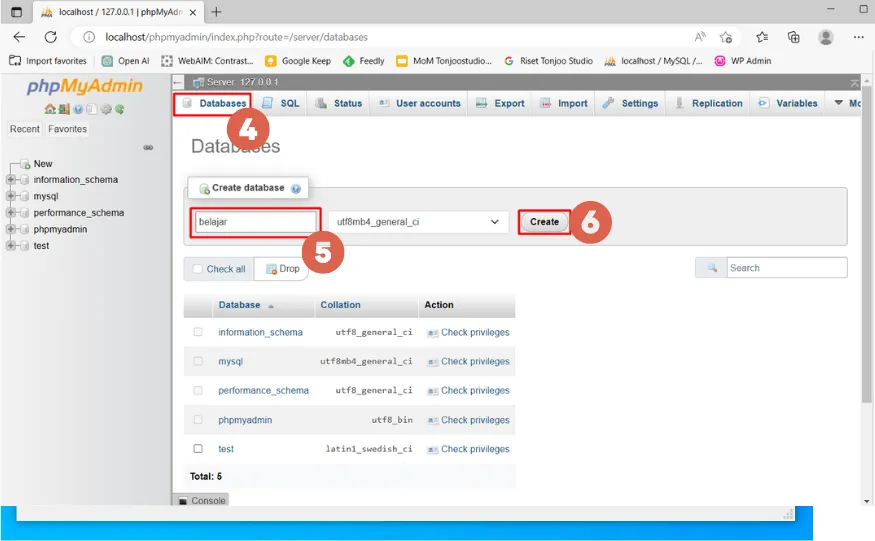
- Go to Database > enter the database name, then click Create
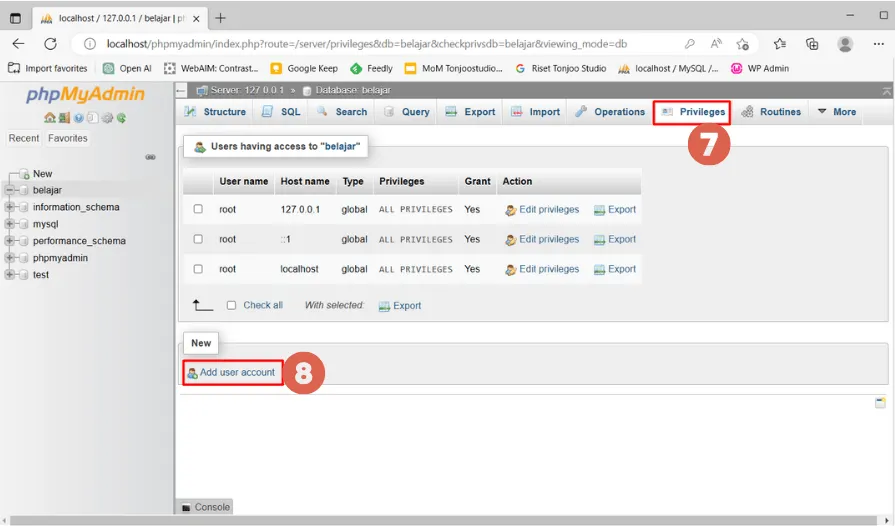
- Click on the Privileges tab to create an account > click Add user account
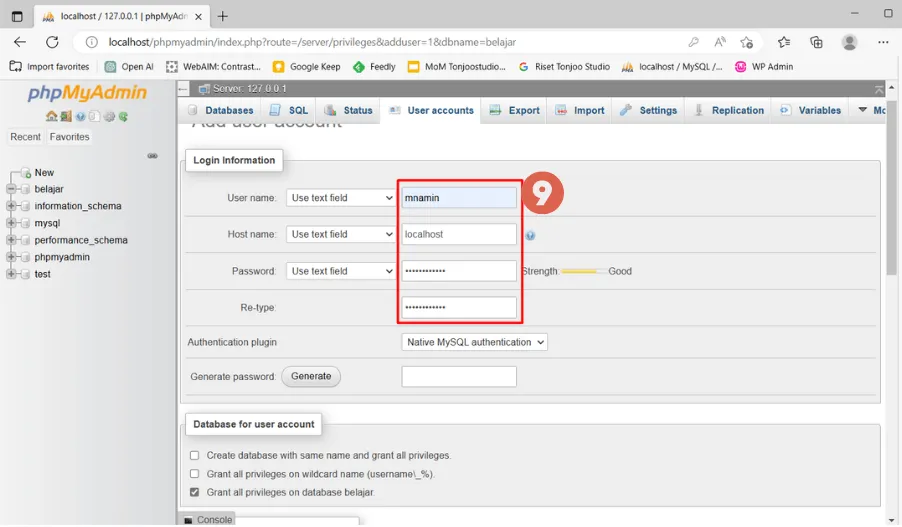
- Enter the login information that will be needed when logging into WordPress
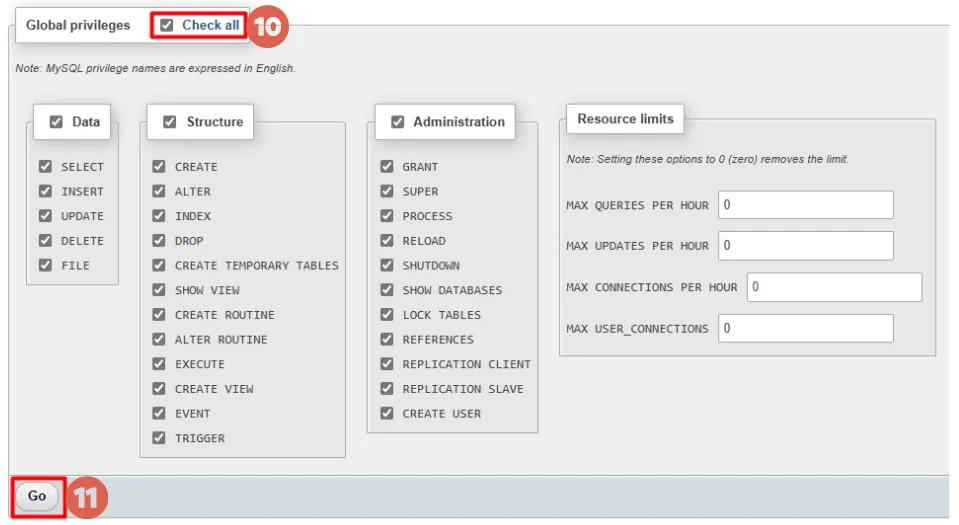
- Scroll down. In the Global privileges section, check all > click Go. This is useful for granting the account access to the various functions checked
- Done! You have successfully installed XAMPP
-
-
How was it? Installing XAMPP is quite easy, right? If you have successfully installed it, you can continue developing your website as you wish. For example, you can install WordPress on localhost.
One common error that occurs in XAMPP is the message ‘Error: MySQL shutdown unexpectedly.’ To resolve this, you can follow the tutorial on how to fix ‘Error: MySQL shutdown unexpectedly.
Have You Successfully Installed XAMPP on Windows?
That’s the tutorial on how to install XAMPP on Windows, which you can now use to develop websites locally. If you’re developing with WordPress, you can also install plugins there.
If you’re unable to install plugins on WordPress, feel free to check out the article we’ve prepared. We recommend trying these plugins on localhost first for testing purposes.
If you need assistance in developing websites, especially WordPress-based ones, you can collaborate with the Tonjoo team, who have extensive experience in developing WordPress based websites for clients like Gadjah Mada University, Hipwee, and more.
If you’re interested in collaborating, feel free to reach out to the Tonjoo team through our contact details.

Updated on September 20, 2024 by Anisa K. Juniardi


