These days, you can find many free and paid WordPress themes available. But there are cases when we need to create our own WordPress theme.
This might be because you want to create a custom theme, or you want to resell it. Here we will explain how to create WordPress theme from scratch on your localhost. Why on localhost? Well, it’s free.
So, how do you create a WordPress theme template from scratch? What are the benefits of creating a WordPress theme by yourself? Here’s the information and tutorials.
Table of Contents
Benefits of Creating Your Own WordPress Theme
There are various advantages to creating your own WordPress theme. One of the benefits of creating a WordPress theme on your own is the increased speed and security.
Self-developed themes are unquestionably quicker in terms of speed since they just employ the features and libraries that are required. While paid or free themes often incorporate many functions that we may not necessarily use.
In terms of security, a self-made theme is also relatively safer because no one has the theme’s source code. This makes it harder for outsiders to reverse engineer the theme and discover security flaws.
According to the author’s experience, in order to start developing a WordPress theme, we must first create a design.
Once the design is complete, it can be turned into a static version (HTML) first, or it can be directly implemented in the WordPress theme. It is entirely dependent on the developer’s skill.
To make this tutorial easier to follow, the theme will be developed based on Xriley’s “Dev-Blog” template. In other words, we will create a WordPress theme similar to that template.
Preparation Before Creating a WordPress Theme
Before developing a WordPress theme offline, you need to do the following preparations:
- Install a blank WordPress on a localhost server. There are two types of localhost server software that we recommend: WampServer and XAMPP. WampServer is for Windows OS. XAMPP is for Windows, Linux and Mac OS. Read how to install WordPress on WampServer or how to install WordPress on XAMPP to get started. In this tutorial, we are using XAMPP.
- Install Git.
- Install a text editor. We recommend using Sublime or Visual Studio Code. In this tutorial, we use Visual Studio Code (VS Code).
- Make sure VS Code and git are running, you can run git via the terminal.
If you’re ready, proceed to the next steps, which include cloning the WordPress theme, creating basic CSS and PHP files.
Step 1: Clone a WordPress Theme
To make creating a WordPress theme from scratch easier, we will clone Tonjoo’s WordPress Theme from Scratch. If you already understand how to clone, just use the following command in the Text Editor.

Follow these steps if you don’t know how to clone:
- Make sure you have installed WordPress on your XAMPP localhost server.
- Open VS Code > click File > click Open folder.

Open location to save cloning file via VS Code.
- Then head to Local Disk (C:) > select xampp > enter the htdocs folder > select the WordPress folder you created. Here we use the name belajarwp > select wp-content > select themes. Then click Select Folder.
- Open Terminal by clicking Toggle Panel on the top right, number 2 from the left.

Opening Terminal in VS Code.
- Type the command git clone > copy-paste url: https://github.com/tonjoo/WordPress-theme-from-scratch.git > click Enter. Wait for the clone process to succeed as shown below. Clone is the process of copying the program code that we will later modify.

Cloning theme with git command.
- Enter the cloned code folder by typing the command cd WordPress-theme-from-scratch > click Enter.

Enter into clone result folder.
- Enter the Commit list by typing the command git log –oneline > click Enter.

Enter into Commit list.
The commit in the repository has been customized according to the theme development steps in this tutorial. After you press Enter, the commit list will appear as follows:

To begin creating an offline WordPress template from scratch, we run the code in the first step by doing checkout to “be0edf4“. Copy-paste the code below:

The command to checkout to be0edf4
The result of checkout is a folder containing the HTML version of the theme.

The result after checkout
With no files in the theme and only a folder, will this theme be able to appear? Of course not. So, when you check in WordPress localhost > Appearance > Themes, it will look like this:

The result of the WordPress theme that has not been inserted with CSS and PHP files.
Step 2: Create style.css and index.php files
To be able to bring up a WordPress theme, you need at least a simple “style.css” and “index.php” file. Here’s how to create Style.css and Index.php files to make a template appear in WordPress.
a. Creating a Simple style.css File
Here’s how to create a style.css file:
- Click File in VS Code > select New File > name the file style.css > click Enter.

Creating new CSS file in VC Code.
- Go to the cloned folder (C:) > xampp > htdocs > (folder name) ours is testingdua > themes > WordPress-theme-from-scratch. Then Enter.

Save CSS file in the same folder as the clone result.
- Fill in the required attributes as in the example below. You can copy-paste them into the empty style.css file created > then Save (Ctrl+S).

Creating style.css file
The CSS code that you can cop:

In this style.css we provide attributes to the theme such as name, theme url, theme author, author url and many more attributes that can be embedded.
These attributes are useful for providing information about the theme itself. To find out what other attributes you can add, check here.
b. Creating a Simple index.php File
Next, please create an index.php file in the following way:
- Click File in VS Code > select New File > name the file index.php > click Enter.

Creating file index.php
- Go to the cloned folder (C:) > xampp > htdocs > (folder name) ours testingdua > themes > WordPress-theme-from-scratch. Then click Enter.

Save index.php file in the same folder as the clone result.
- Fill the file with the code below. You can copy-paste it into the empty index.php that you created > then Save.

Fill in the index.php file with the code provided.
Here is the PHP code that you can copy:

WordPress uses a template hierarchy system to render a page. Index.php is a fallback template where if no suitable template is found, the index.php template will be opened.
Therefore, WordPress themes must contain at least an index.php template. In this example, the index.php file calls the Hello Word text along with the WordPress header and footer.
Step 3: Activating the Theme
At this point, you’ve successfully created a WordPress theme file. But it’s still empty. To know the result of the first step, we can check it in the following way:
- Open WordPress on localhost.
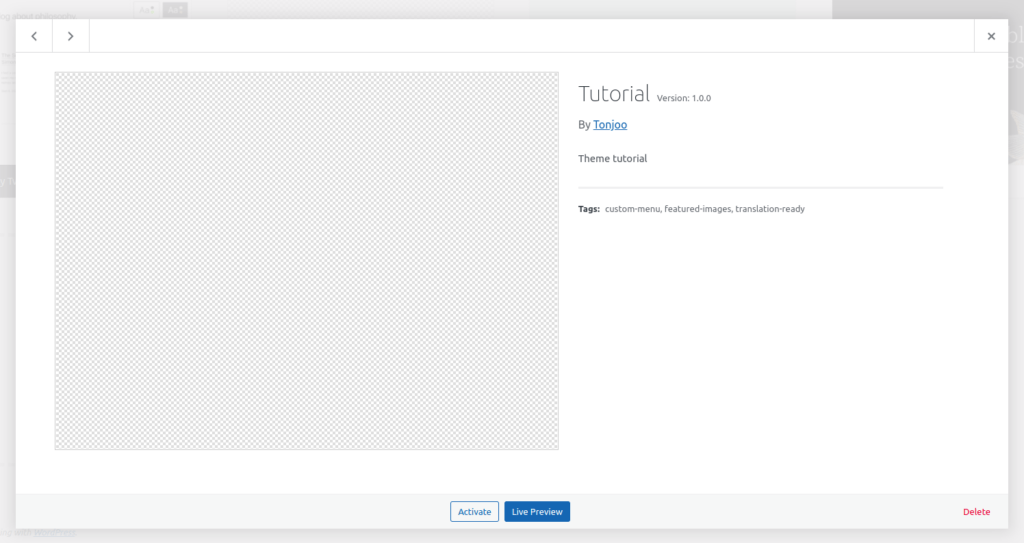
- Choose Appearance > Themes. The theme we named tutorial has been installed complete with the attributes we implemented in the style.css file.

View the theme on your WordPress.
- Next step, click the Activate button to activate the theme.

Activate the theme.
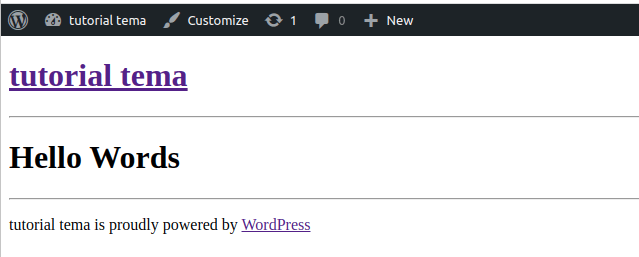
To check the result of theme development, open the main page of your website. Then the text Hello words will appear as follows:

Front-end appearance of the theme.
You can also create a post and publish the post, if the post page is opened, the Hello Words text will still appear according to the WordPress template hierarchy.
This is the tutorial on how to create WordPress theme for beginners. To continue developing the theme, please read the tutorial on creating a WordPress theme (part 2), which is related to developing functions, headers, and footers.
If you don’t want to mess around with various website development issues, you can leave it to Tonjoo Team, a professional website developer with more than 10 years of experience.
We have handled everything from government websites to start-ups, such as Gadjah Mada University, Hipwee and Borobudurpark. Let’s discuss your desired website description through Contact Tonjoo and we will help you make it happen!
Updated on October 31, 2023 by Admin Tonjoo


